Wednesday, May 30, 2012

Raised Garden Beds from Rescued Wood

Once: Scraps of perfectly good wood rescued from the burn pile at a local big box hardware store. 

Now: Beautiful raised garden beds filled with herbs and veggies.

No. That's what I heard when I asked the teenager working at the big box hardward store if I could purchase a stack of wood boards I'd pulled from a large wood bin in the lumber yard. He said his supervisor told him "Since this wood was from the burn pile, we don't sell it. Tell her she can go inside and buy new 2 x 4 boards."   Well of course, that sounded CRAZY to me. Why turn away someone willing to pay for perfectly good wood scraps destined to be burned? More importantly, why were they burning them versus recycling them? (That's another subject for another day.)

Luckily, the kid agreed with me. He said under his breath, "Go ask the building materials supervisor. He may have a different answer." With a little perserverance on my part and thankfully, some common sense on the part of the building materials guy, I was able to buy all the boards I needed to make this new raised garden box for $18.

I can't take credit for this idea. My good friend Don made us the first one.  We've enjoyed planting an herb garden in it for years now. This year though, I wanted to expand my gardening skills beyond planting a few herbs and a single tomato plant in a pot.  I knew I could make a new box all by myself. 

Here's how I did it:

Materials you'll need.
  • 1 x 6 pretreated lumber scraps (ideally from your local big box store's scrap wood bin.)
  • 4 x 4 boards for the corner pieces
  • Deck Screws
  • Metal Drywall Corner Bead
  • Black metal spray paint
  • Deck Stain


Determine the dimensions of the box you want to make. That will dictate the length of boards to cut.

Cut all boards and metal corner bead to the desired lengths.
My box is 50" x 30" x 18"
6  1"x 6" boards cut 50"
6  1"x 6" boards cut 30"
4 x 4 boards cut 18"
Metal Drywall Corner bead

To assemble the box, I attached the 1" x 6" boards to the 2" x 2" corner pieces.


I like the look of old boxes with metal corners. To recreate that look, I sprayed the metal drywall corner bead with black spray paint. Once the box was assembled, I attached the corner bead to the corners of the box.


Next, I wanted something for vines and tall tomato plants up to tie up to, so I removed the glass panes from an old window frame, stapled chicken wire to the frame, and attached it to the back of the box.


    I stained the box. I didn't like my first stain choice. Plus, it was different than the box I already had. So, I restained both boxes, and added metal corner bead to the box I already had so they would match.

    My box doesn't have a bottom. Doesn't need one. I placed it next to my fence directly over the dirt.
    Before adding the soil, I lined the sides of my box with biodegradeable landscaping cloth to make sure no soil came through the cracks when I watered. I added soil to the box. Here's a great article on how to calculate soil for your bed.

    I added the plants. Tomatoes, Arugula, Cucumber, Peppers, and Asparagus Beans. My herb bed has Cilantro, Basil, Rosemary, Orange Mint, Chives, Dill, Parsley (Curly and Flat leaf). I'm getting a lot out of a little space. So far, it's all coming along nicely. I'll let you know how it goes.


    Wednesday, April 11, 2012

    Primitive Wooden Treasures Redefined as Wall Art

    Here's my homage to days past when people used their hands to do everything. No machines. No computers. No electronics.  I finally decided it was time to put them to use... in a new way, that is... as wall art.

    These pieces all have one thing in common...decades of authentic character and a work-your-fingers-to-the-bone patina.  I can't help but make up fantasical stories to go along with these primitives:


    24" Hand Carved Wooden Dough Bowl:  He carved this critical kitchen tool by hand for his bride as a wedding present, which then became the most coveted item she had to pass along to her daughters.  Naturally, it was left to the oldest, though her sisters stopped talking to her after that.


    Vintage Wooden Wash Board: All you need is this "great American invention," a bar of soap, a convenient stream or large bucket, and you're all set to join the ladies on wash day.  Plunge, Scrub, Repeat.

    Milking Stool: This short wooden stool sits just a few inches off the ground making it easier for Farmer Joe to milk Bessie, especially when she begins to protest and attempt to knock over the bucket. I mean, the top of the seat is no bigger than his hand. Imagine sitting on that every morning and afternoon.


    Here's another look at it all put together.


    A close up of the painting next to it. (I did that, too. )


    Can't decide if I want to put something on top of the stool, or leave it plain.  What do you think?


    Monday, April 9, 2012

    Pedestal Bowl Revamped

    Once: A boring pedestal bowl used at potlucks to serve up fruit salad. 
     
    Now: A beautiful textured piece used to display fruit or fresh flowers.

     Here's how to make it:
    1. Find a boring old bowl, vase, or pedestal serving dish from a flea market, garage sale, or your local Goodwill.
    2. Purchase some rope. You can find colorful sisal rope from craft stores or online.
    3. Get out your trusty hot glue gun and attach one end of the rope to the bottom of the dish.
    4. Wrap the dish with the sisal, using dabs of hot glue to hold the next wrap in place in a few places as you wrap.
    5. Finish wrapping the entire bowl.


    Reimagined Computer Desk

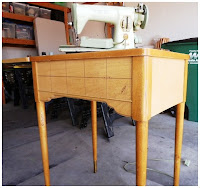
    Once: A sewing machine/table Mom used to sew herself and the kids a new Easter outfit every year. (I'm the little one in the blue dress.)
    Now:  A compact desk with extending table, perfect for the lazy person (that would be me) who wants to sit in her comfy chair with a cup of coffee and read her blogs every morning.

    Here's how I did it:
    I purchased a sewing table at a local flea market for $10.  I loved the clean lines of it and how it would extend out, and fold up for compact storage. For the price, I figured I couldn't go wrong.  I stripped all the old hardware off and took out the sewing machine (a lovely shade of green).

    I wanted the table to be able to swing around in front of the chair I sit in each morning with my coffee reading, so I can work on my computer without having to get up. (Lazy, I know.) So, I cut off the old metal legs and added wheels.

    Next, I stripped the table down to the bare wood, and after testing a stain on the wood, I found the wood wasn't the best quality and the stain didn't look good. So, I decided to paint it. I used multiple shades of browns, with a hint of burnt orange and mustard yellow and achieved a faux woodgrain.


    After the painting was all done, I added vintage wallpaper from a great old sample wallpaper book I found in an antique store.  I love the character this adds!

    This is the view from my chair.

    Now, all finished. I can store the computer away in the desk when it's not in use and extend the table and get to work without having to get out of my comfy chair.